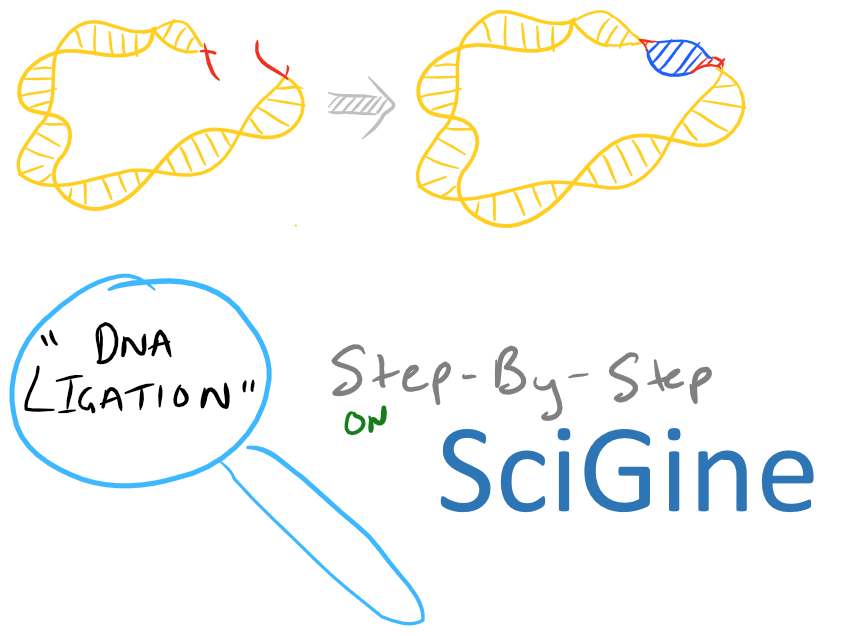
Ligation of Sticky Ends, Summary of DNA ligation
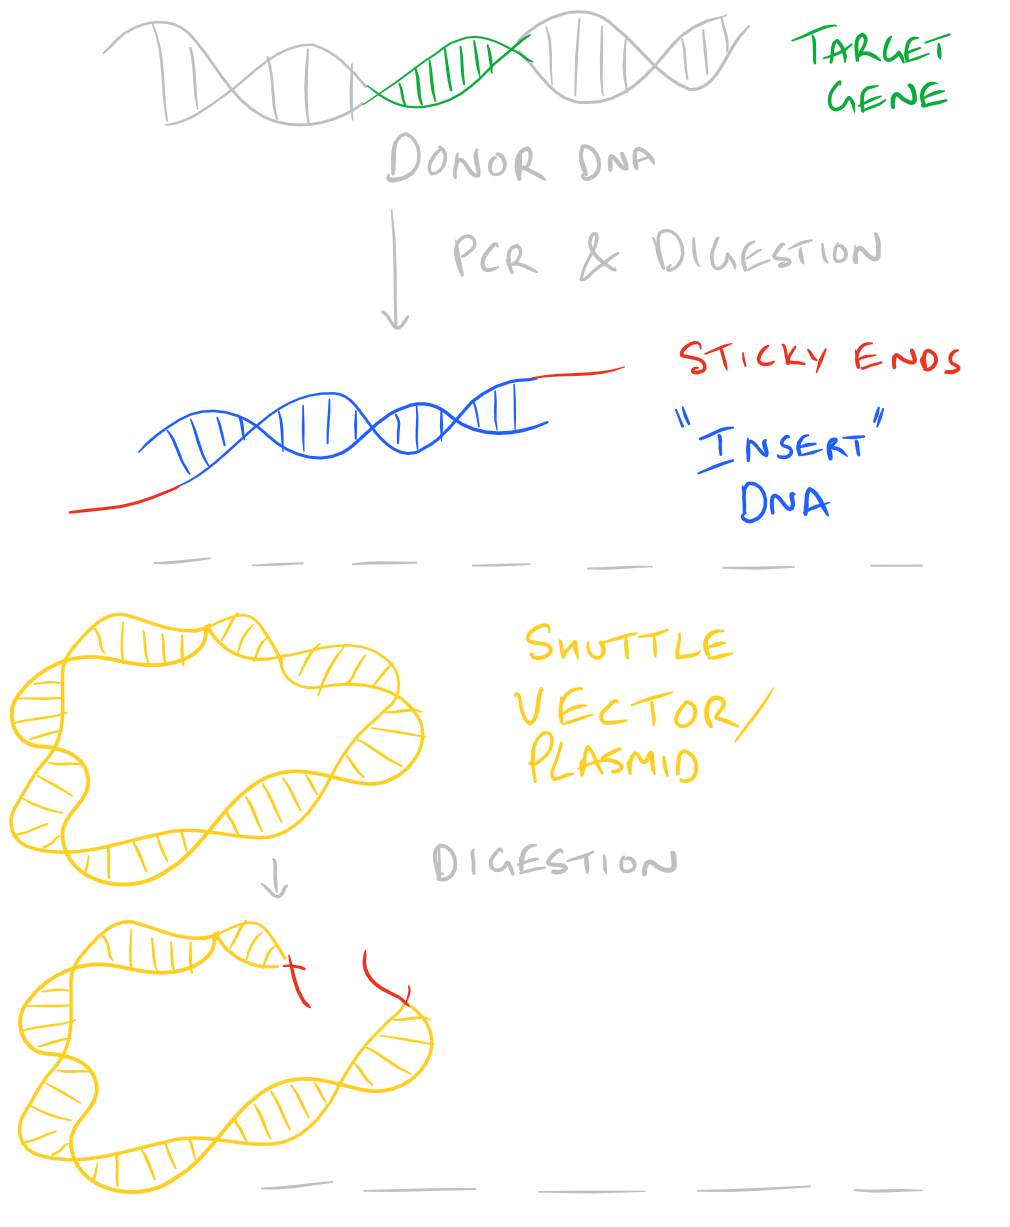
We have already discussed a high level view of gene cloning in our Molecular Cloning Guide blog post. However, in that blog post we didn’t delve very deep into how we can perform each of the individual steps. Today’s blog post is about ligation. Ligation is the process by which two pieces of DNA can be glued together to form one piece. So, to begin, let’s assume you’ve already decided on a gene product that you want to clone. You’ve also designed primers and completed PCR on the open reading frame in your donor DNA (this could be genomic or non genomic DNA). Your next steps are to digest the PCR product with restriction enzymes and generate sticky ends. You’ll also want to digest your “shuttle” plasmid to generate complimentary sticky ends which will allow your “insert” DNA to click into position into your vector. It’s like a puzzle piece!
Note: It might be useful to look at our RNA Extraction & Isolation guide if you’re planning on making cDNA related to your gene.
The above summary is demonstrated here:
Only some Restriction Enzymes Create Sticky Ends
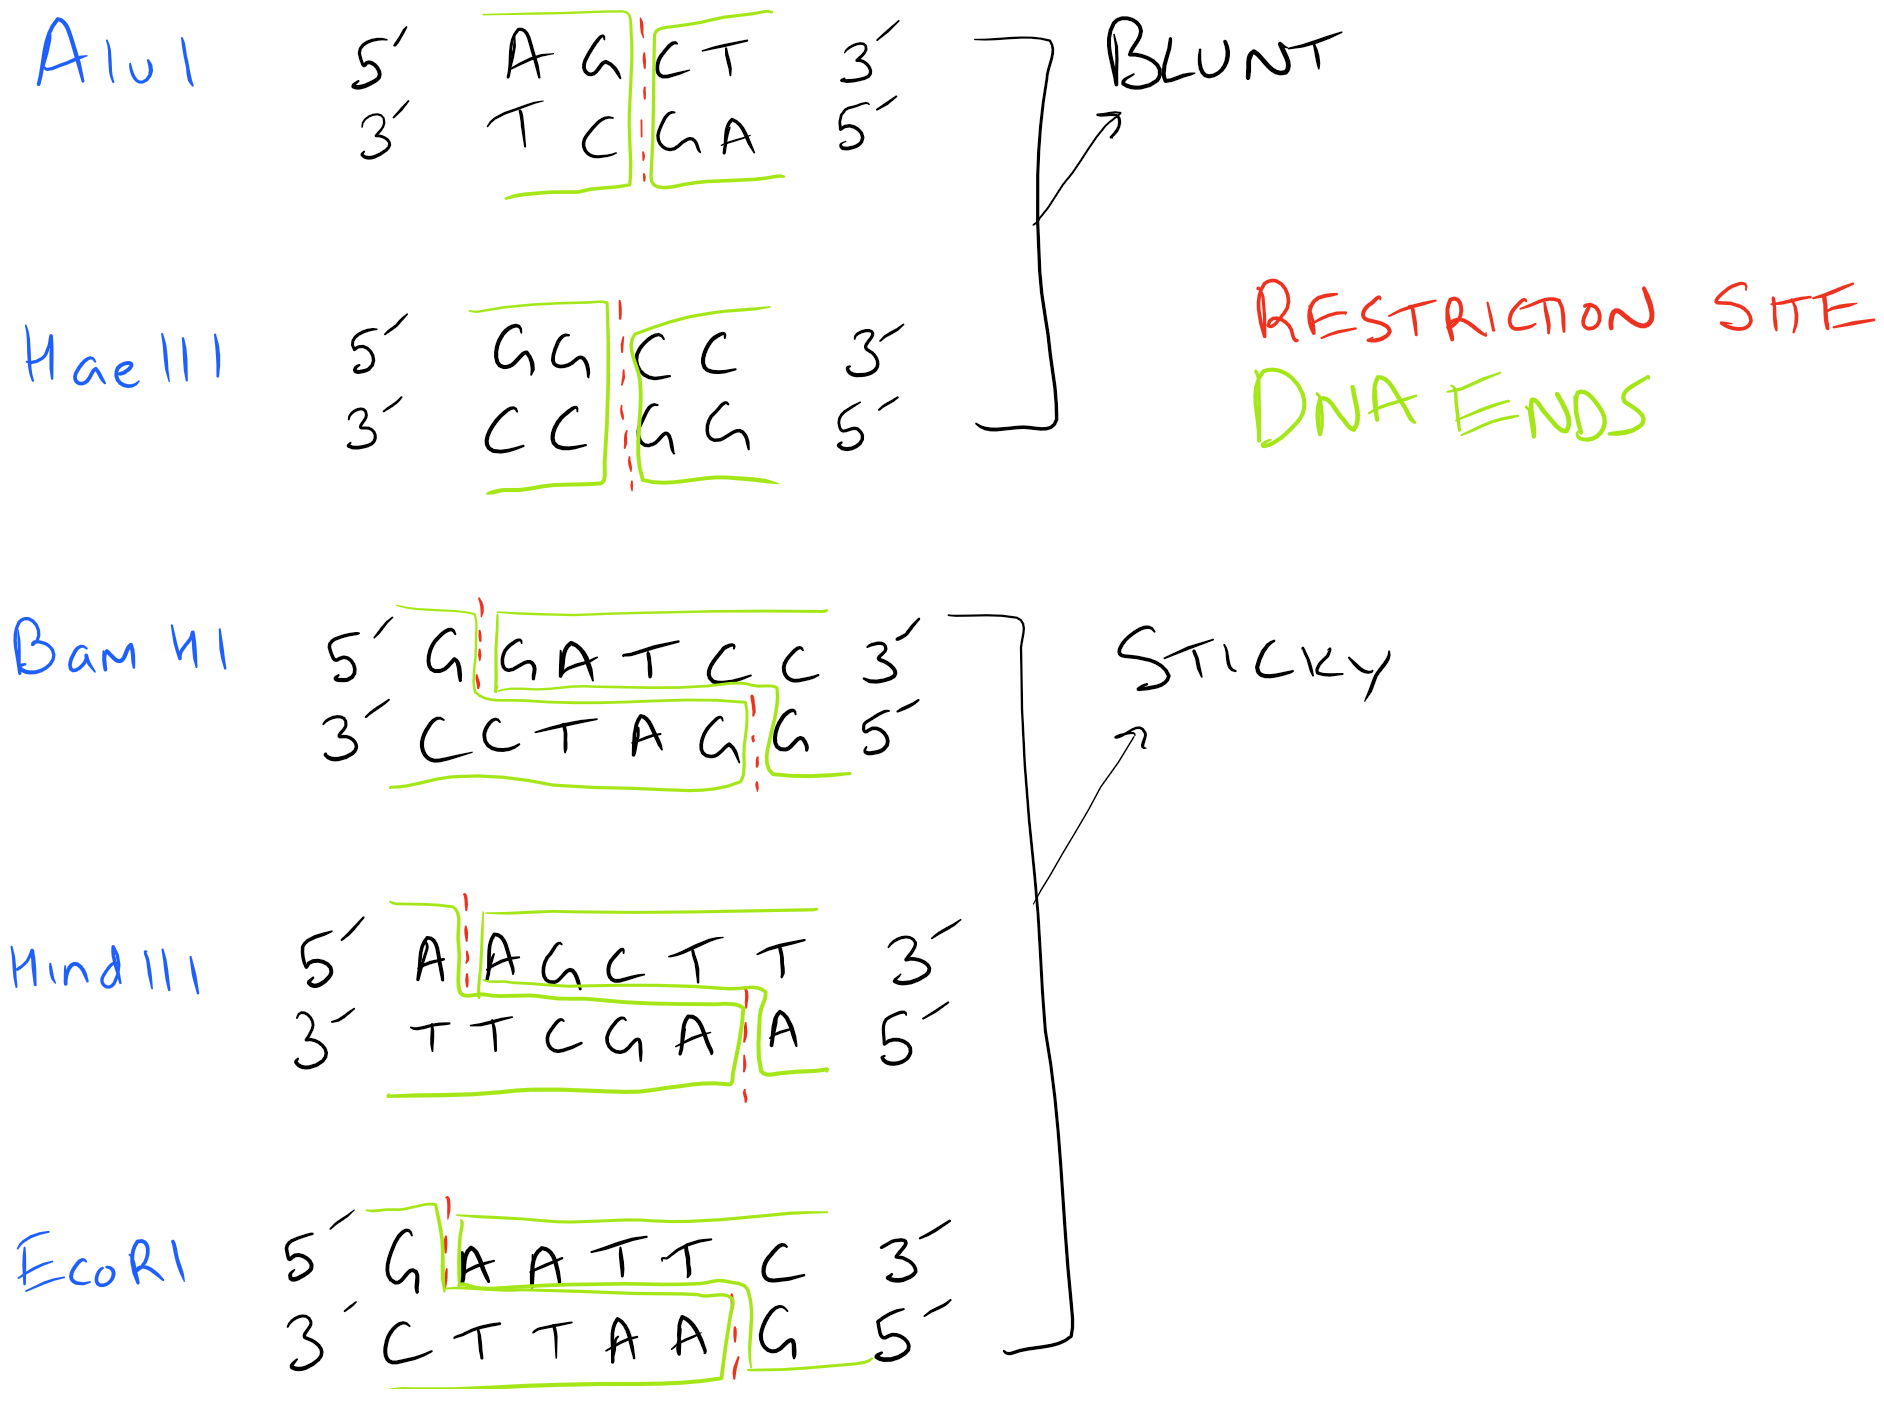
As you can figure out, generating sticky ends and complimentary ends is extremely important to the above process. However, several different restriction enzymes are available and each of them has different locations where they cut. Also, the type of cuts that they introduce may be “sticky” or “blunt”. Depending on the cloning strategy you are using, you may mix and match different enzymes to achieve different end goals. Ligation of “sticky ends” is much more efficient than ligation of “blunt” ends. Typically 10-100 times more T4 Ligase is required for blunt ends.
Here’s an image with various restriction enzymes and the kinds of ends they produce. Depending on the type of ends, your DNA ligation will proceed very differently!
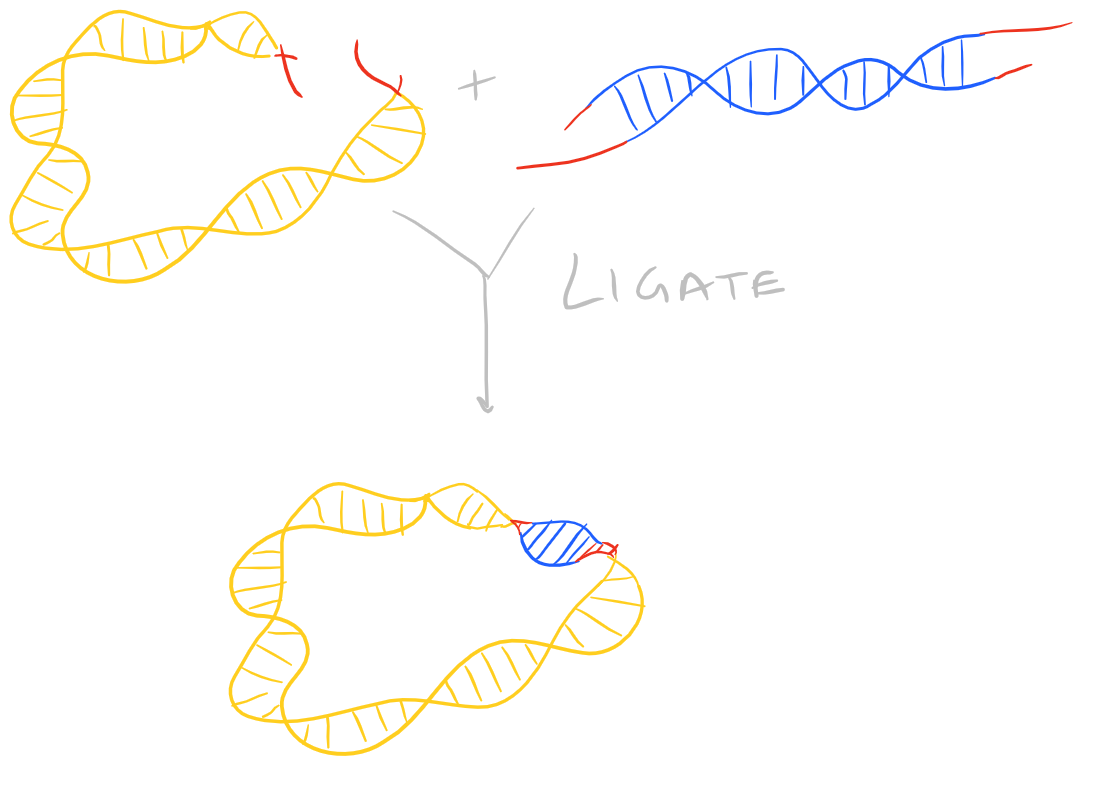
Ligate DNA via DNA Ligase
Once the restriction enzyme digestion is complete, you can proceed to the ligation step. But, before you digest anything, make sure you’ve planned everything properly! You need to make sure that the insert will be ligated in the proper direction in the shuttle vector. Only once you’ve vetted your overall strategy, should you proceed to ligation and transformation, etc.
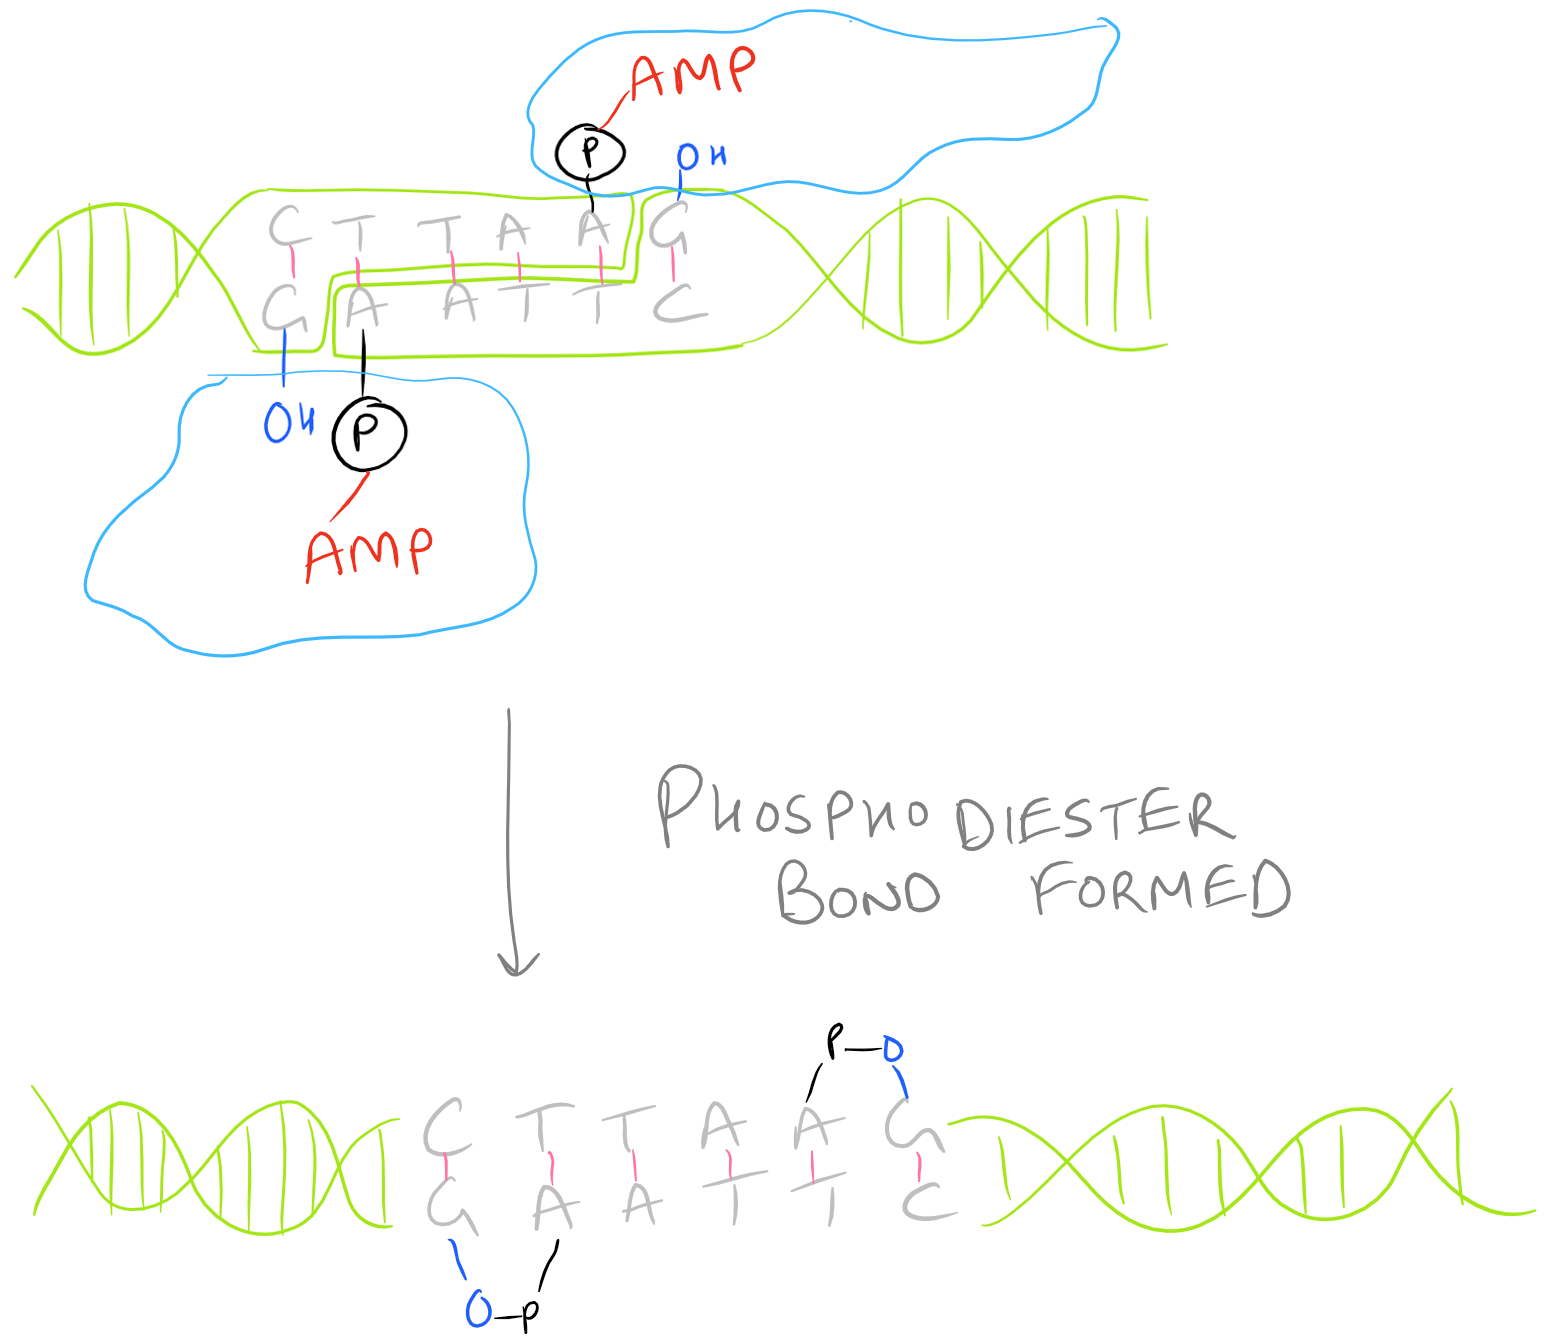
There are several kinds of ligase enzymes but the enzyme produced by T4 bacteriophage-infected E. Coli is the most common one. This ligase is called T4 ligase. Whereas normal E. Coli produce DNA ligase that uses NADH as a cofactor, T4 infected E.Coli produce a ligase that uses ATP as a cofactor. This enzyme will find the 3′ Hydroxyl and 5′ Phosphate within your sticky ends and it will form a phosphodiester linkage. If this is confusing, check out the Polymerase chain reaction (PCR) guide for images on what DNA looks like. This is shown here:

Protocol for Ligation of Transgene Insert into Shuttle Vector
Ligation enables fragments of DNA to be combined, such as the cut ends of transgene inserts and plasmids during cloning. This protocol describes the directional cloning of a XbaI/SalI-digested transgene into a shuttle vector, pAdtrackCMV, via cohesive end ligation.
Materials for DNA Ligation
XbaI/SalI digested, gel-purified insert (approx. 1 kb) and pAdTrack-CMV shuttle vector (approx. 9.3 kb; Plasmid #16405, Addgene)
Quick Ligation Kit (contains DNA ligase and 2X Reaction Buffer; #M2200S, New England Biolabs)
Agarose plate containing ethidium bromide
DNA standards
Note: Grammarly is a free grammar check plugin for Chrome. I used it for this article and really like it! Try it out here…
Ligation Methodology
- Estimate the DNA concentration of purified insert and vector preparations by applying 1 µl to an agarose gel plate (+ethidium bromide) alongside a range of DNA standards and visualizing under UV light.
- Prepare the ligation mix as follows:
XbaI/SalI digested pAdtrackCMV 50 ng
XbaI/SalI digested insert 17 ng
Add water up to 10 µl total volume.
- Add 10 µl of 2X Reaction Buffer and mix.
- Add 1 µl of DNA ligase and mix.
- Microcentrifuge briefly to settle liquid to the bottom of the tube and incubate at 25°C for 5 min.
- Place on ice* and transform into desired bacterial strain.
Tips and Tricks for DNA Ligation
- This reaction setup is using a digested insert to vector DNA molar ratio of 3:1. Inserts of different sizes will require a different amount to be added. Important ligation control reactions to include are (1) digested vector only and (2) digested insert only.
- Ligation reactions can be stored at -20°C for future use
In case you’re interested in other ways to ‘click’ your molecules together, use bioorthogonal chemistry tools like click chemistry! We’ve discussed more in our article.
Applications of Ligation on SciGine
Construction of PB42 Vectors Via Ligation
Plasmid Construction via PCR and Ligation
Plasmid Ligation and Transformation in Yeast
Construct with Human p275UTR
Different DNA ligation methods discussed
Video Tutorial About Sticky Ends and Ligation
References
He et al Proc Natl Acad Sci U S A. 1998 Mar 3. 95(5):2509-14.
Sticky Ends Explained Well
DNA Ligation Theory
Gaastra et al. Ligation of DNA via T4 Ligase
Tsuge et al. One Step Assembly of DNA fragments
The application of vent DNA polymerase and strategies of extension products capture and linker tag selection greatly improves the sensitivity of ligation mediated PCR. Thus the application of ligation mediated PCR on mitochondrial DNA sequencing could be significant.
Atosiban, you’re correct. In the beginning of PCR, sensitivity and yield were big hurdles. Nowadays, things are much simpler.